I've been meaning to write this for awhile now and am a little backed up with writing about my FOs.
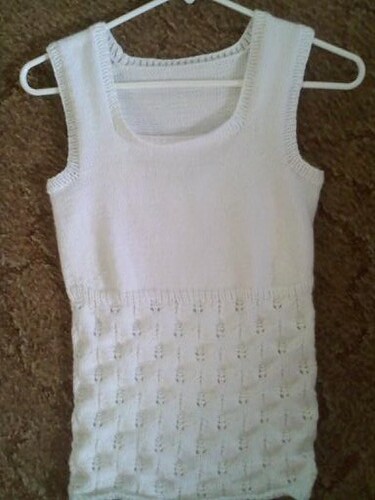
The Lillian tank (designed by Amanda Reed) is a gorgeous tank with simple shaping and a fun lace pattern on the bottom. The problem is... the shaping was TOO simple and I had to modify it as I went along.
When I start a project, I usually research what other people have said about the pattern for at least an hour (sometimes more if you can believe it). What other people have said about this pattern on Ravelry was that there was a lot of stockinette on the top as the sizes got larger, which makes sense except that it was too much stockinette especially in the back as there was no bust shaping in the front. So girls that were simply busty (as opposed to just being bigger all around) had issues with the fit up top and in the armholes. I'm not necessarily busty (makes me sad to write this but after three kids... the girls kind of lose their girth) but I do have short shoulders (not sure if that's what they are really called but lets just say my bra staps are almost always as short as I can make them and I need to shorten the straps on tank tops so that I'm not looking like I work at a peep show).
Before I could even start this project with all the modifications I had planned in shortening the shoulders, widening the straps (I had noticed that the strap size is the same for all sizes and some of the Lillians made in the larger sizes had straps that were way too far out to the edge and it looked awkward), and adding short rows, I noticed an issue with the gauge. It took me days to try to wrap my head around it. Before even making a swatch, I noticed a discrepancy. For a size medium (36-38") at a gauge of 5.25 stitches per inch, you are instructed to cast on 154 sts. This equates to about a 29 1/3 " circumference. There were no increases at the bust area. There's no way that that would fit anyone with a 36-38" bust. It's not just this size. All of them have extreme negative ease. The only thing I could think of to explain this was that the designer used a cotton/acrylic blend and was compensating for a possible stretch. The other thing I couldn't wrap my head around was why the heck she wanted us to use a 16" circular to knit it. Yes, one is needed for the trim at the end around arm and neck holes but for the body of the tank that's a lot of stitches (esp at the bigger sizes).
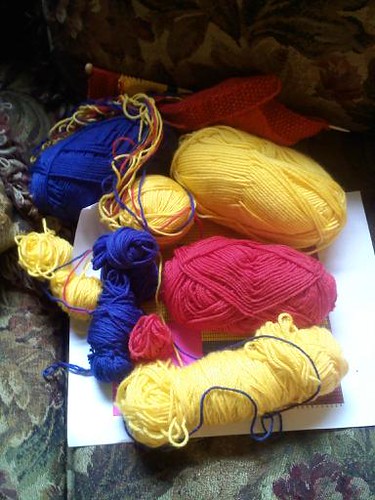
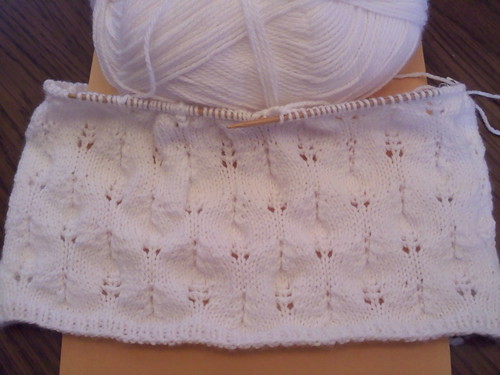
After starting twice, I cast on for the size large (40-42" bust) to have enough to go around my waist comfortably with enough ease with a gauge of 5.5 stitches per inch on size 5 24" circs. I used Bernat Softee Baby solid in white which is a sportweight yarn.
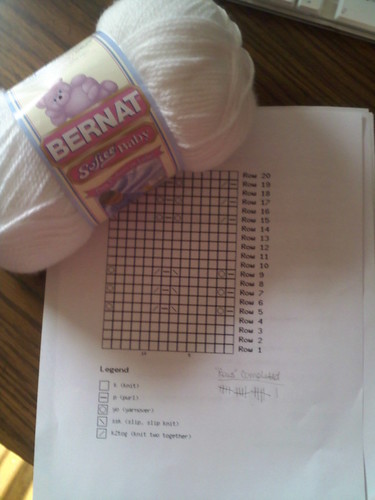
I created my own chart for the pattern instead of the line by line instructions using
this chart generator and went for it. I did a half of a repeat more than the lace pattern called for to lengthen it a bit but I wish I would have done another whole repeat as it shortens up a bit as I wear it (so I would have made it 5.5 repeats long or so).
When I got to the bust portion I added 8 staggered short rows to add an extra inch of fabric to the front. Once I got past the short rows, I followed the directions for length of stockinette portion for the smallest sizes and tried it on multiple times to make sure it was right. When it came to the straps however, I made them 14 stitches wide instead of 8. There is about a half inch of ribbing on both sides of the strap but I didn't think it be wide enough to cover the straps of the camisole I'd wear underneath as well as hide the ol' bra straps.
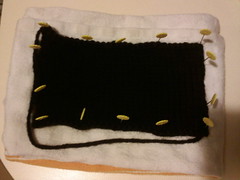
I steam blocked the heck out of the lace portion because I needed it to flatten out as much as possible. Turns out that I maybe should have made the xtra large size for the bottom. It fits around the waist, but I wish I had a bit more ease to hide the "baby pouch" a little bit better.
But, it's still cute, and I got a lot of compliments on it when I wore it. No one believed me that I knit it and didn't buy it at a store.
(Pic above is pre-blocking)